HSBKITxM
Overview
HSBKITxM (Holoscan Sensor Bridge) provides a FPGA based interface for low-latency sensor data processing using GPUs. Peripheral device data is acquired by the FPGA and sent via UDP to the host system where ConnectX devices can write that UDP data directly into GPU memory. This software package based on nvidia official HSB v2.2.1 package and add supports for SENSING HSB cameras with Lattice Holoscan Sensor Bridge device.
Key Features and Application
Features:
• Support Nvidia Holoscan Sensor Bridge(HSB) Platform
• Output Pixel:Max 3840*2160
• Support different focal length lens
• Output format: RAW/YUV422
• Allow customization
• Dimensions :L:185mm x W:77mm x H:41mm
• Compatible with AGX Thor and AGX Orin
Application:
• Industrial
• Robotics
• Medical
• Inspection
Getting Started
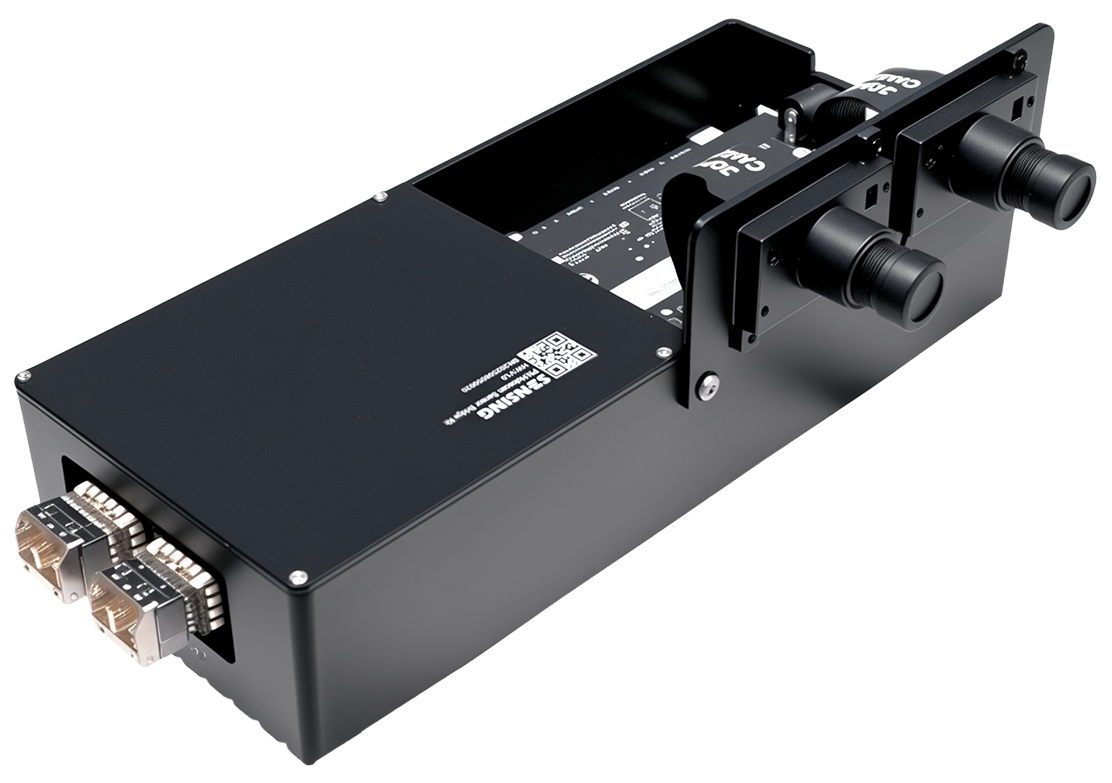
Hardware Overview
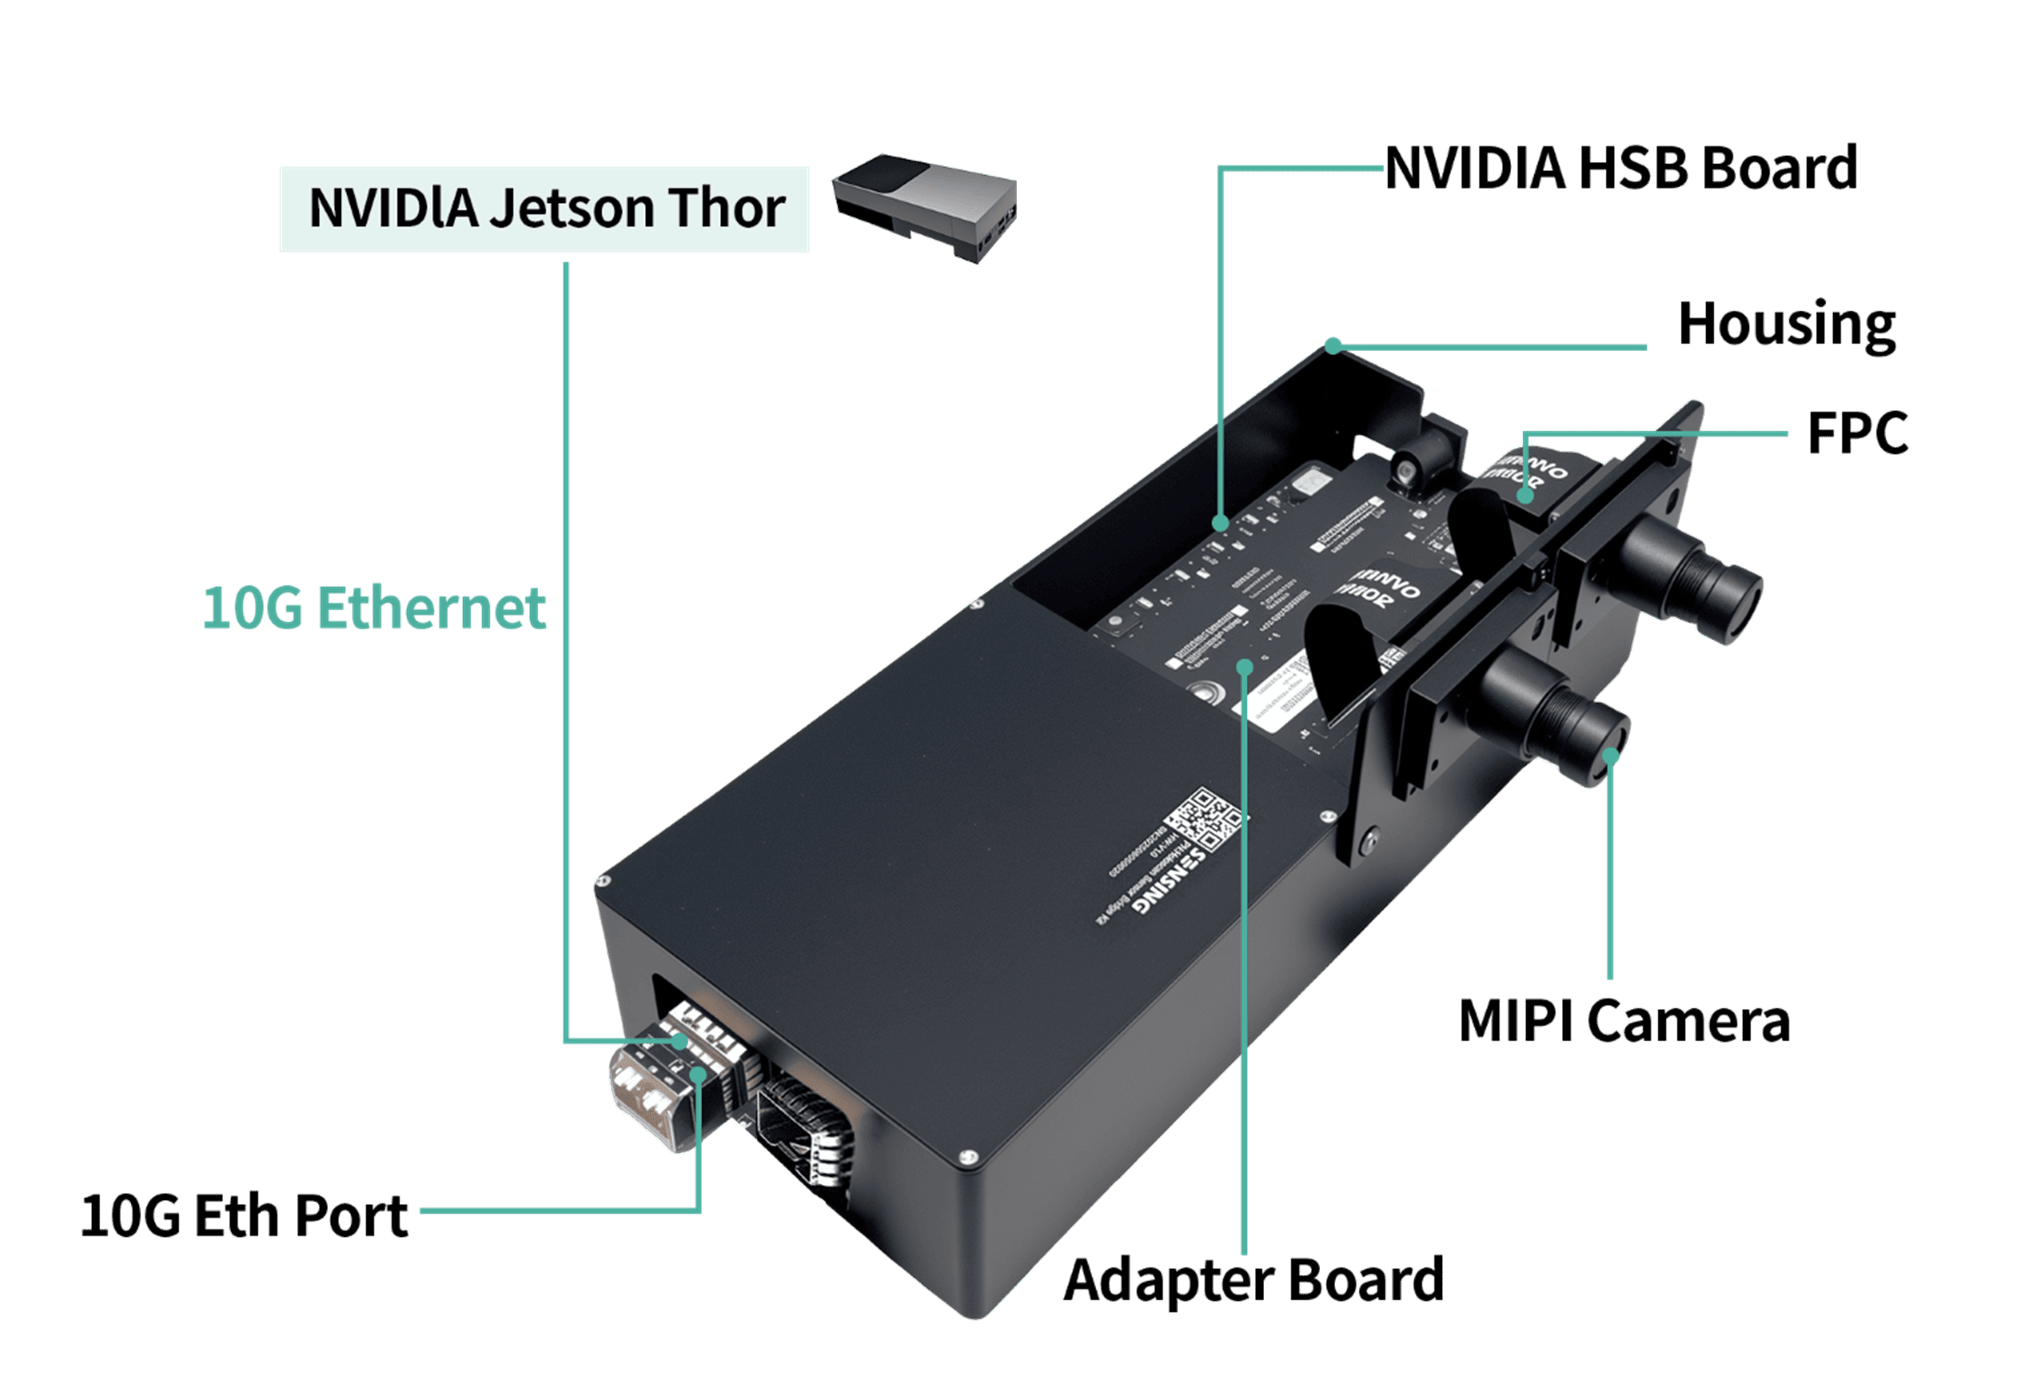
Figure 1: HSBKIT2M
Recommended Package
You may choose the following Product model
| Product model | Parts | Camera Key features | Product Image |
|---|---|---|---|
| SENSING-HSBKIT2M | Holoscan Sensor Bridge Kit *1pcs SG8-IMX678C-MIPI-H80K *2pcs | 8MP_MIPI RAW Camera(Rolling shutter) | |
| SENSING-HSBKIT4M | Holoscan Sensor Bridge Kit *1pcs SG8-IMX678C-MIPI-H80K *2pcs SG2-AR0234C-MIPI-H60F *2pcs | 8MP_MIPI RAW Camera(Rolling shutter) 2MP_MIPI RAW Camera(Global shutter) | 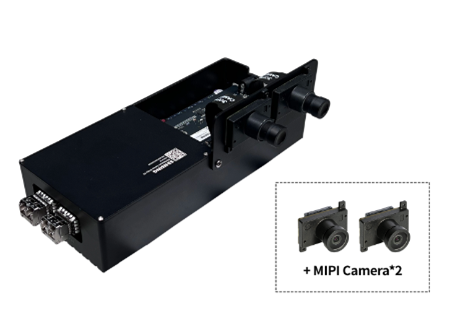 |
| SENSING-HSBKIT6M | Holoscan Sensor Bridge Kit *1pcs SG8-IMX678C-MIPI-H80K *2pcs SG2-AR0234C-MIPI-H60F *2pcs SG3-ISX031C-MIPI-H100F1 *2pcs | 8MP_MIPI RAW Camera(Rolling shutter) 2MP_MIPI RAW Camera(Global shutter) 3MP_MIPI RAW Camera(Rolling shutter) | 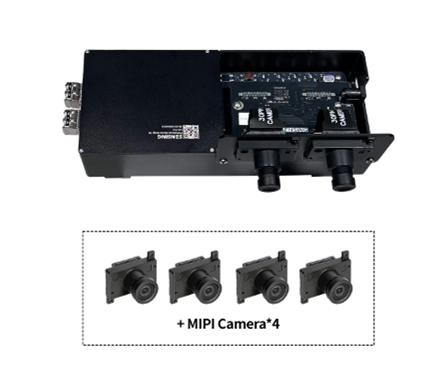 |
Hardware Preparation
Parts List(only for HSBKIT2M)
| Serial number | Product model | Quantity | Remark |
|---|---|---|---|
| 1 | Holoscan Sensor Bridge Kit | 1 | up to 2 cameras at most |
| 2 | SG2A-HOLOSCAN-MIPI-A1 | 1 | Standard configuration |
| 3 | SG8-IMX678C-MIPI-H80K | 2 | Standard configuration |
| 4 | FPC_0.5mm_L-50mm | 2 | Standard configuration |
| 5 | M2.5*5 | 2 | Standard configuration |
| 6 | MPO to LC 10-Gigabit 1-to-4 Fiber Optic | 1 | Standard configuration |
| 7 | QSFP-100G Multimode Optical Transceiver Module | 1 | Standard configuration |
| 8 | 10-Gigabit Multimode Dual-Fiber Optical Transceiver Module | 2 | Standard configuration |
| 9 | Power adapter | 1 | Standard configuration |
| 10 | Type-c data cable | 1 | Standard configuration |
| 11 | JETSON AGX THOR DK | 1 | optional configuration |
| Parameter | Specification |
|---|---|
| Sensor | SONY 8.29MP IMX678 RGGB |
| ISP | - |
| Image Size | 1/1.8 inch CMOS |
| Output Pixels | 3840H*2160V |
| Frame Rate | MAX 60fps |
| Pixel Size | 2.0μm × 2.0μm |
| HDR Support | Yes |
| Output Data | MIPI/RAW@10bit/12bit |
| Power Supply | 3.3V |
| Current | < 300mA @3.3VDC |
| Camera Interface | FPC |
| Connector | FH67-30S-0.5SV |
| Operating Temperature Range | -30°~+85°C |
| Dimensions | W: 20mm, L:35mm, H:25mm |
| EFL | 4.0mm |
| F/NO | 2.6 |
| Optical Distortion | 88% |
| Field of View (FOV) | HFOV76°/VFOV42° |
| Lens Mount | M12xP0.5(Supports the assembly of different lens) |
| Weight | < 50g |
SG8-IMX678C-MIPI-H80K Specification
HSBKIT2M Kit Contents

Figure 2: HSB Accessories for AGX Thor
Installation Steps
- Connect HSB MIPI Camera Onto Holoscan Sensor Bridge Board
- Connect all to Jetson AGX Orin Devkit or Jetson AGX Thor Devkit
- Connect the power supply(DC 12V)
- Boot system and Bringup camera
Software Preparation
SDK Download
Select the appropriate SDK package based on your operating system and CIG4-8H hardware version:
| Download Link | Download Tool |
|---|---|
| SDKDownload | DownGit |
DownGit allows you to download specific folders or files from GitHub repositories without cloning the entire repository:
- Copy the GitHub repository URL from the "Download Link" column
- Open DownGit in your browser
- Paste the repository URL into the input field
- Click "Download" to get a ZIP file containing the SDK
- Extract the ZIP file to your desired location
This method is particularly useful when you only need the SDK files without the full Git history.
Quick Bring Up
-
Please first complete the "Host Setup" described on extensive user guide
-
Clone this software package onto device
-
Enter the software package path and execute the command "sh docker/build.sh -igpu" to build the Holoscan Sensor Bridge container
-
Execute the following command at the device terminal to getinto the demo container
xhost +
sh docker/demo.sh -
Execute the following command to bringup SENSING MIPI Camera
-
For sg2_ar0234c_mipi
python3 examples/linux_sg2_ar0234c_mipi_player.py -
For sg3_isx031c_mipi
note : only capturing image data and saving pictures are supported, and pictures will save to "captured_images" folder
python3 examples/linux_sg3_isx031c_mipi_capture.py -
For sg8_imx678c_mipi
python3 examples/linux_sg8_imx678c_mipi_player.py
-